Having the right materials is important. For a recent silver working class I had just bought needle files and from a previous wax carving project I already had the wax scalpel kit. Now I needed to figure out what kind of wax to use.
After jotting down a few ideas I called my local jewellery stuff supplier, House of Jewellery in Sydney, and chatted with the extremely so helpful staff who listed to what I wanted to do and then were able to suggest the best wax products to purchase - as I have absolutely no idea about this stuff except it burns well in candles!
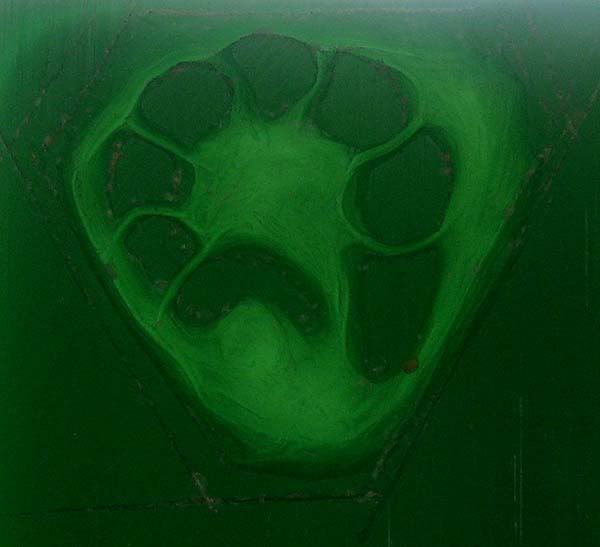 So after receiving my multi-pack of wax tablets, I first photographed my original doodle and then inserted it into word multiple times in different scale sizes. Then after printing it out I figured out the particular size/scale needed and cut out the scorpion segment shapes with really small scissors. After taping the little picture onto the wax I used a pin to lightly score the scorpion tail segments and the shield shape. Then it was a process of carving away the bits I didn't need while trying to protect the segments. I found that I ended up using the half round tapered needle file the most for this project. Here is what I came up with in the wax against a bright light. It's a good way to see if you are carving the relief the same thickness I've found as thicker will show as darker green. I left the recessed areas rather rough in texture on purpose. All up I would say I spent about 5 hours creating this wax mould.
So after cleaning up the wax piece, my client said there is a potential to sell a few more of these within her community so I sent my wax carving off to Chem Gold in Sydney to create a mould and the two sterling silver castings. I first received the mould and one casting and, when I called Chem Gold to order the second casting, they kindly paid for the postage without prompting! What great customer service! The casting came back looking fantastic with a large burr and it took me about 2 hours per ring to get the "button" as I took to calling them cleaned up and straight enough for soldering onto the ring bases.
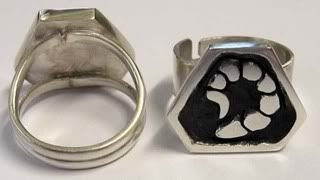
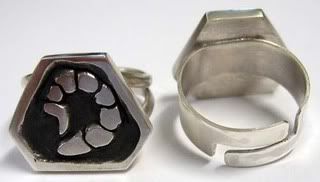
After cleaning, filing and leveling the top of the casting I then had to figure out how to create two individualised ring bases. My client wanted one for herself so I wanted to create a more feminine looking ring base and she required an adjustable band for her son (it's his birthday present) so he can wear it as long as he's interested. The original ring she showed me was a very heavy signet ring look so I played with using asymmetrical bands, then settled on creating a V shaped ring base using half round sterling silver wire 3 mm x 2 mm for her that was soldered together at the bottom of the finger and then curved out to touch the top and bottom of the ring top. For the son's ring I cut out a 6 mm band from .06 mm sterling silver sheet and created asymmetrical tabs that would line up when curved.
After cleaning and polishing the rings I used a liquid Liver of Sulfur agent to darken the recess around the scorpion's tail. It was a very satisfying project to undertake!