In all experiments, I used 1 mm thick s/s sheet.
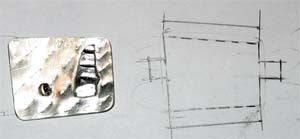
Experiment 1: 1 silver s/s ball, one fine silver ball and 1 x 9 karat gold ball
 Fusing requires a lot of concentration and careful flame control. In an ideal set up, I would have a bunsen burner type flame heating the back plate from underneath to get the metal hot and then use another flame to do the final melting of the top surface from above. Sadly, I don't have a pluthera of materials in my workshop, so I used one plumbers LPG torch from above with the biggest head possible which leaves very little room for minute control.
 I learned in this first experiment that s/s melts quickly, 9 karat gold melts next and fine silver holds it shape quite well compared to the melting point of the s/s backplate. The s/s ball and gold ball resemble fried eggs as I was trying to get the fine silver ball to finally fuse to the backplate.
Conclusion of this first experiment was to have all items I am fusing to one backplate all the same material for consistent success without complete meltdown of a feature.
Experiment 2: All s/s features and 1 x 9 karat gold ball
 I wanted to pin point which melted first, s/s or the gold. Obviously some quick internet research would have told me, but I'm a tactile crafter and like to figure these things out myself. I whipped up a spiral, flattened a big s/s ball, and a few other scrap s/s bits lying around and placed one small gold ball bottom right corner. By the time all of the s/s features had fused to the backplate, the gold ball was again a fried egg.
Conclusion of second experiment is fuse s/s stuff first and do the gold separately.
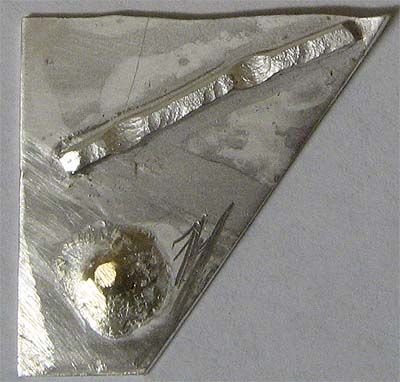 Experiment 3: one s/s feature and one larger 9 karat gold ball
 I textured up 1.5 mm thick scrap s/s wire and tried a bigger gold ball to see if I could get better control. Obviously 9 karat gold melts much quicker than s/s. But the fried egg look is less obvious, I still ended up with a nice ball of gold to look at.
Conclusion was to definitely put the gold on last after all other fusing is finished.
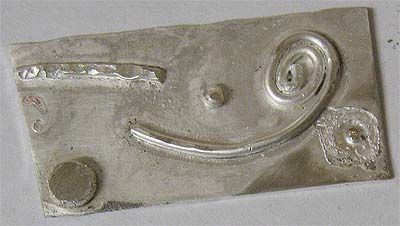
 Experiment 4: Get the 9 karat gold ball to work
I am unsure how I made the folded ribbon looking s/s feature, it was just a scrap at the bottom of my collection of bits. The s/s feature was fused first and then I fused the gold ball second. And it worked! A perfectly formed gold ball instead of breakfast. The back plate started resembling reticulated silver after the multiple heating sessions.
You can see the edges of the back plate were really melted after this experiment.
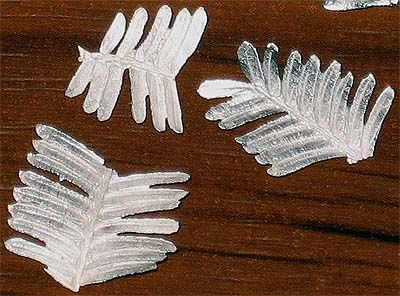
Experiment 5: Precious Metal Clay (fine silver) plant forms, s/s bits and a fine silver bezel setting
 The fusing session took a while to really get everything melted and fused together. Again, you can see the backplate showing a bit of reticulation and that bezel was a tad melted on the top before I took the torch away. But it worked!
I was pleased to see that the bezel ring had not changed shape and still fit the stone it was made for. The bezel setting was nice and tall so after assessing the melting damage, it was deemed useful.
After all of this experimentation, I decided to make a little pendant. This featured 3 fine silver balls, a PMC leaf of mine and a fine silver bezel. The back plate became warped and slightly reticulated again, but I liked the look so left the waves. A s/s tube bezel was soldered to the top, pendant polished, stone set and a pretty little pendant indeed.

2 comments:
I saw your last post about the bezel setting and your silver smithing skills have really come far. Your works look great and your dedication into perfecting them is just amazing. Others would have given up on failing the second or third try, but you just took them as learning experiences, which is an important trait for an artisan. I hope you can update us more on your current works! Thanks for sharing!
Rosemary Bailey @ WABI
A big thing I have learned as a backyard silversmith, a failure in Sterling silver is still a feature waiting to become prominent decoration in a future project!
Post a Comment